
Assembly of one of the 3-ft bookshelves unites the 6 pieces of the unit and a few hardware screws.
The six pieces are: the 2 legs, the front brace (kick panel), the bottom shelf, the top shelf and the middle shelf.
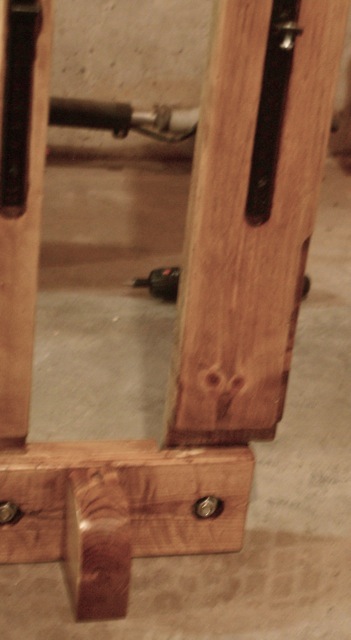
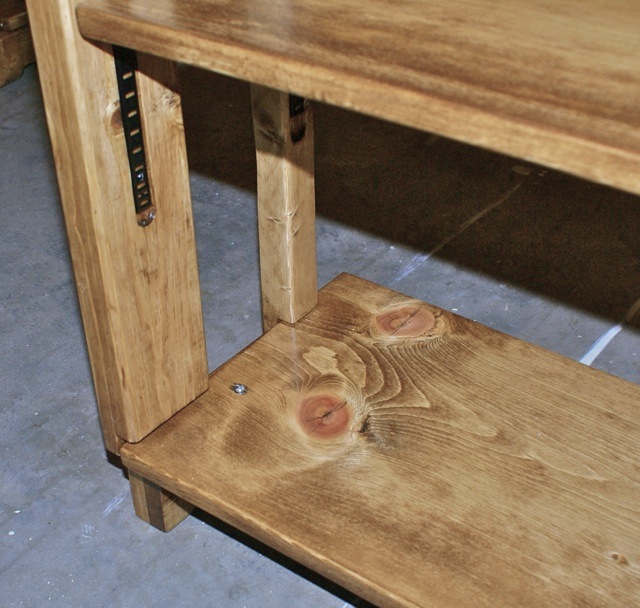
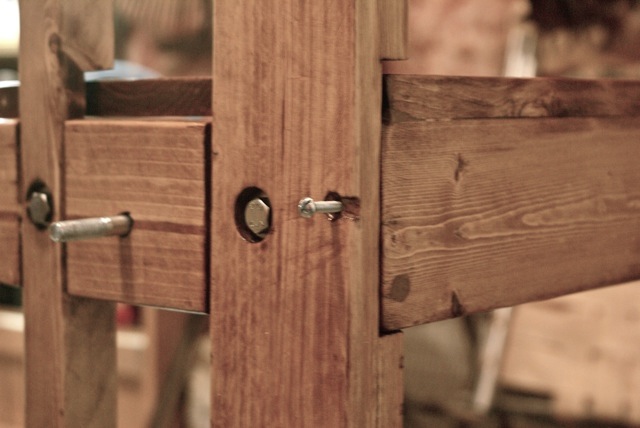
The bottom shelf is secured to the leg using 2 wood screws. These screws were deemed essential for keeping the shelf unit from wobbling side to side. This may not have been required if my tolerances were tighter and the wood didn’t warp so badly. But in the end, it’s really not too bad to have only 4 screws and 2 uniting bolts to disassemble an entire 6-foot Bookshelf.
Attachment of Locking Front Brace or Kick Panel
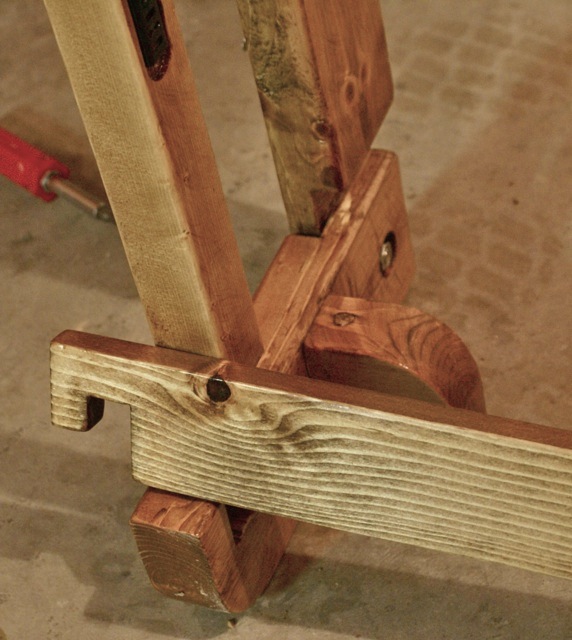


Insertion and Attachment of Bottom Shelf
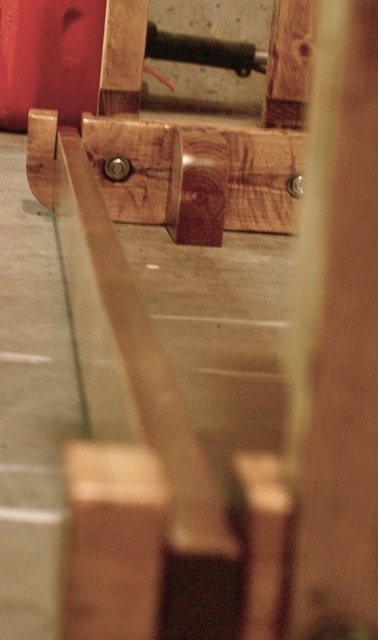
Lower horizontal cross bar of Leg
Front of Leg <——- Back of Leg ——–>
(notice notch for wall baseboard)
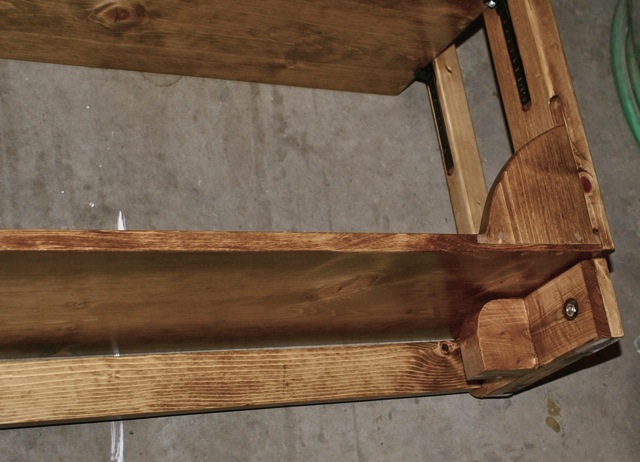
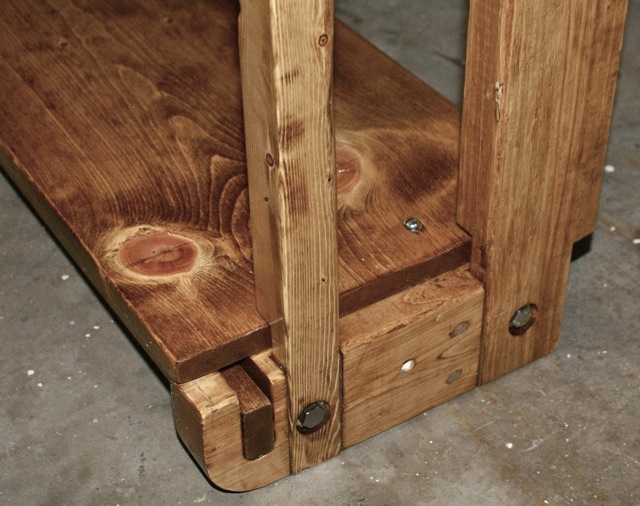
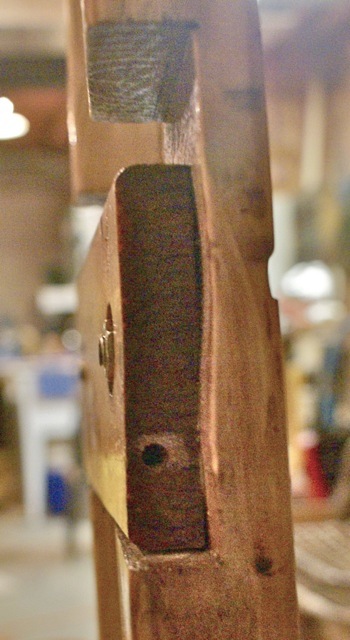
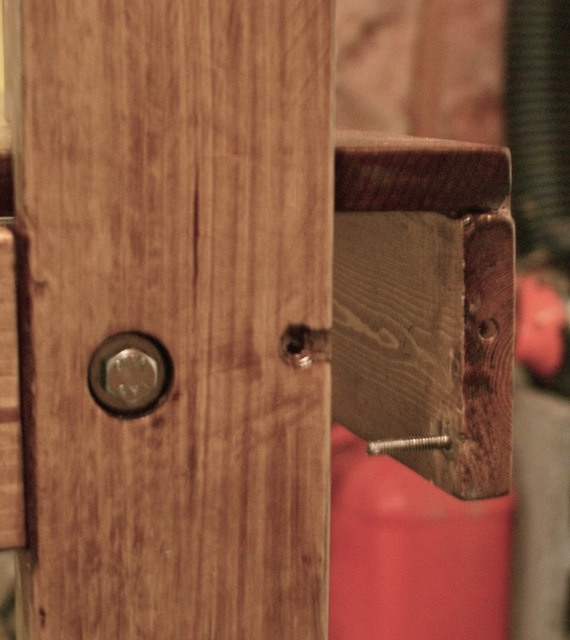
Just above the lower horizontal cross bar, the 2×4 and 2×2 vertical legs were band saw cut to leave enough space to slide in the 3/4″ shelf. The internal brace on the horizontal cross bar (part sticking out toward viewer) has a hole on top to lock in the shelf once installed.
____________________________________
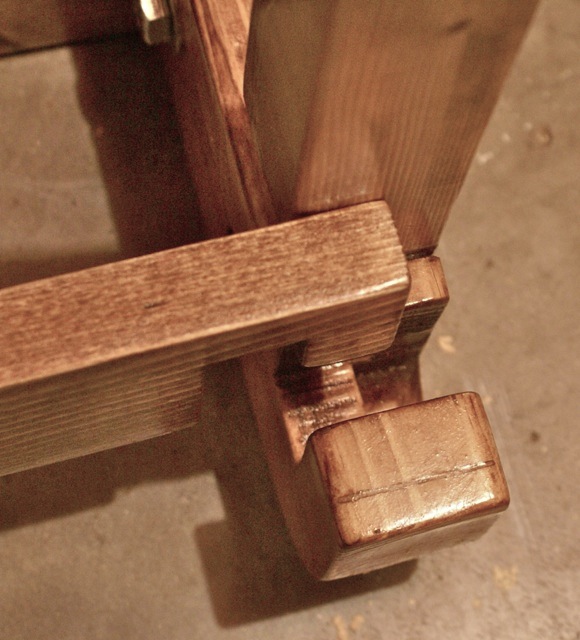
 Bottom Shelf being slid into place
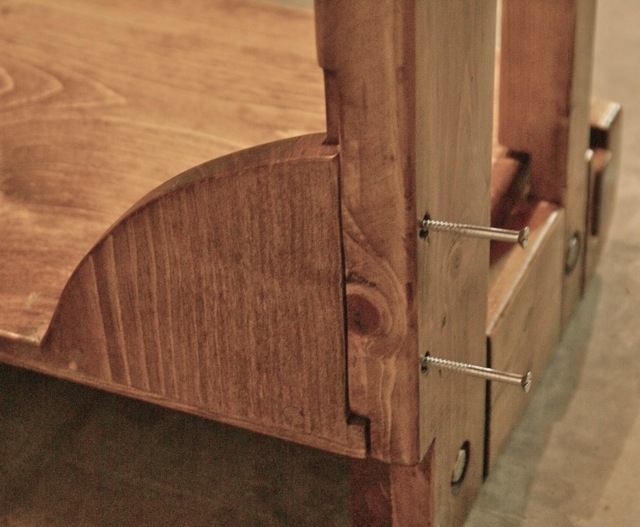
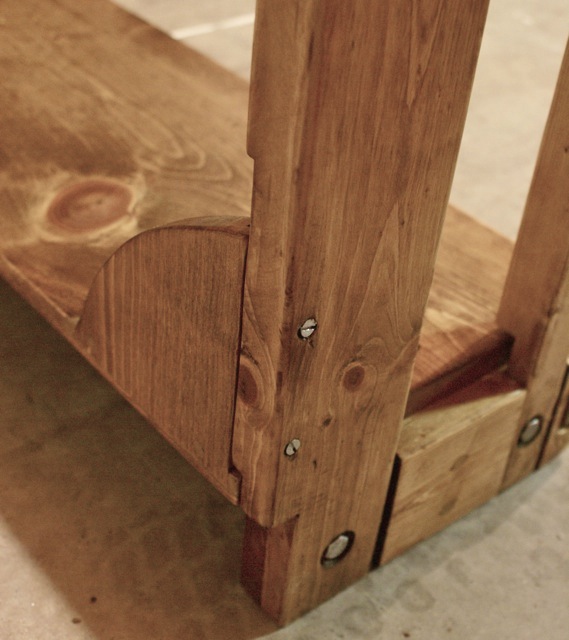
Note ‘Fin’ on back of bottom shelf. This is edge-routed to fit flush with the back of the shelf and the back of leg. It is screwed and glued into place as a permanent part of the bottom shelf.

These are the two screws I tried my hardest to avoid. They are what keep the shelf unit from wobbling. There is a similar fin and locking screws on the second 3-ft unit also. Meaning there are a total of 4 assembly wood screws and two nut and bolts that will unite the two 3-ft sections (will be shown later).

Next, screws were used as pins to lock the bottom shelf to the legs. The screws insert into the brace that was added to the lower horizontal cross bar. The next few photos show the top and bottom views of shelf.


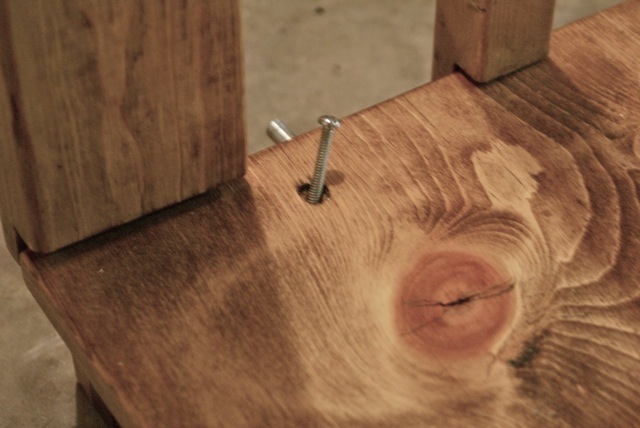
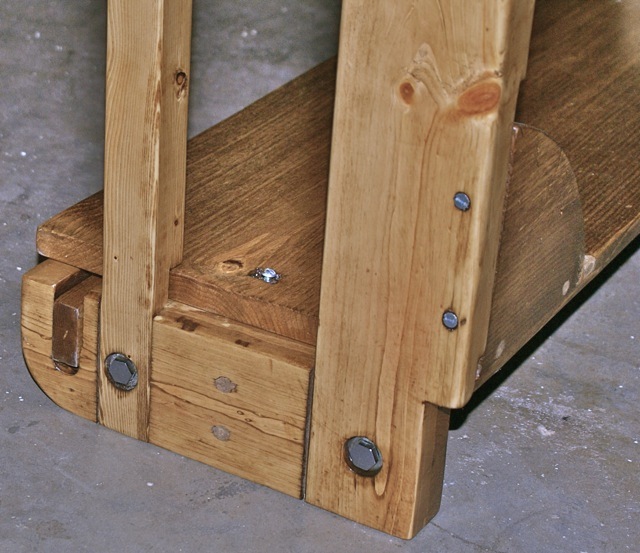

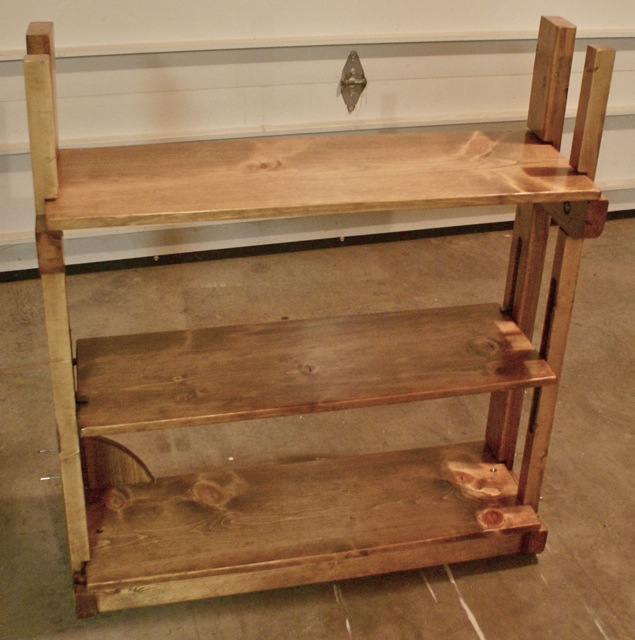
 Bottom shelf installed and locked into place.
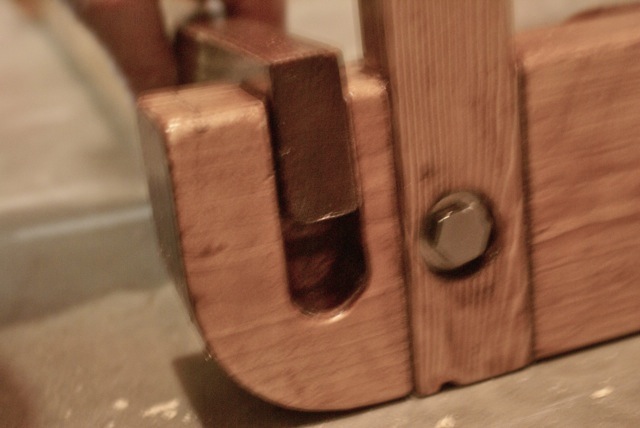
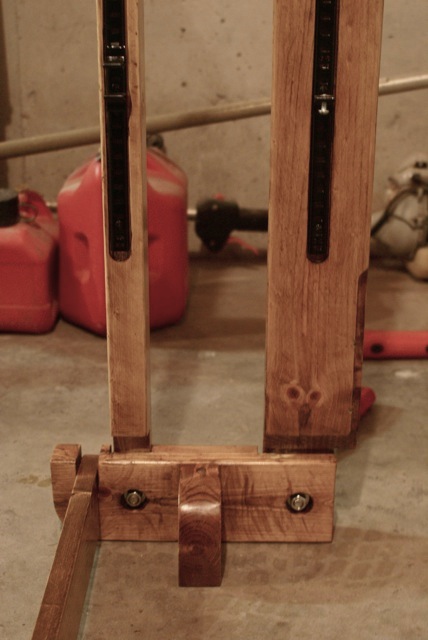
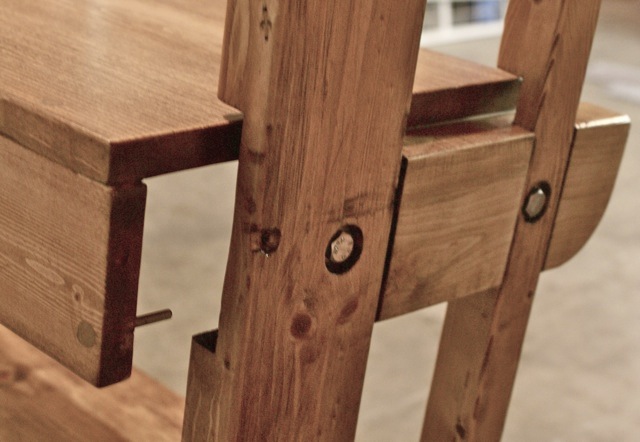
Insertion and Attachment of Top Shelf

Upper horizontal cross bar of Leg
Front of Leg <——- Back of Leg ——–>
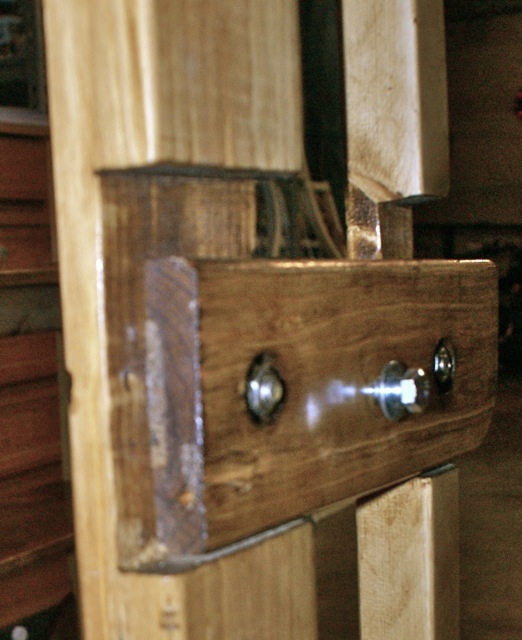
Notice the space at the back side of cross bar left for an upper support panel
which is attached to the shelf.
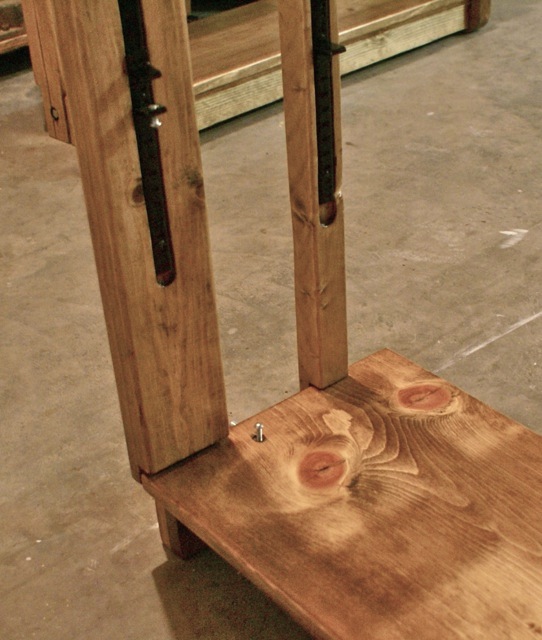
Just above the upper horizontal cross bar of the leg, the 2×4 and 2×2 vertical legs were band saw cut to leave enough space to slide in the 3/4″ shelf. The upper shelf will lock into the back of the upper horizontal cross bar with a pin to keep the shelf from sliding off the leg and will also be locked in a 90 degree direction from this to keep the shelf from sliding back off the leg, as shown in subsequent pictures.


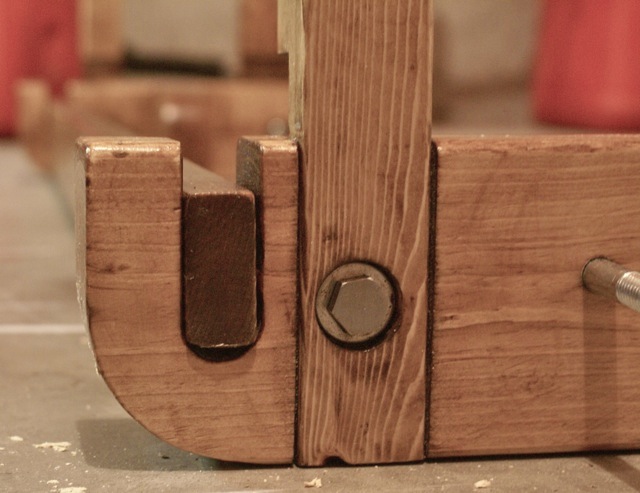
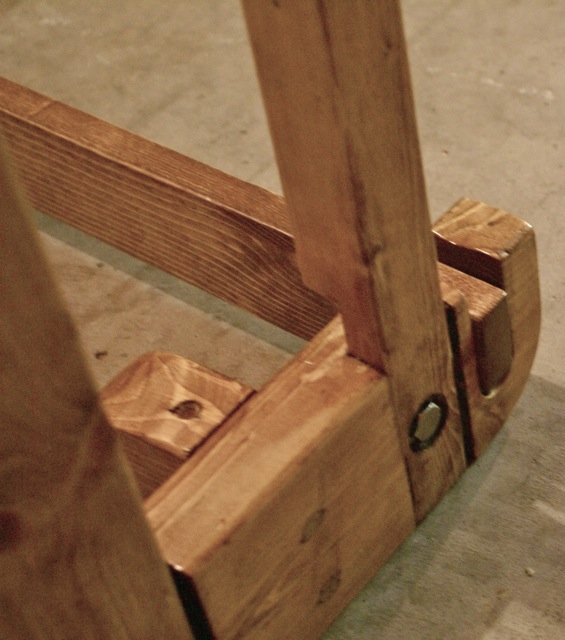
Shelf Insertion – Note Locking pin which is a screw that is permanently mounted to the upper shelf
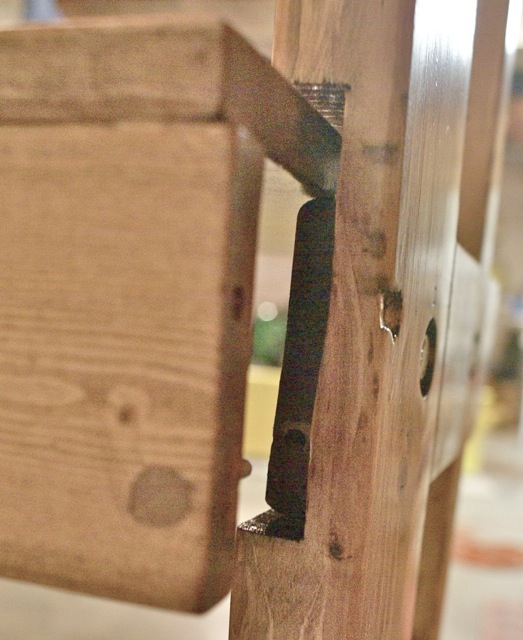


Upper shelf is held in place from forward-back movement by the side locking pins. Again, these are just screws that push in to holes in the back panel which is permanently part of the upper shelf. The upper shelf is now locked into place.

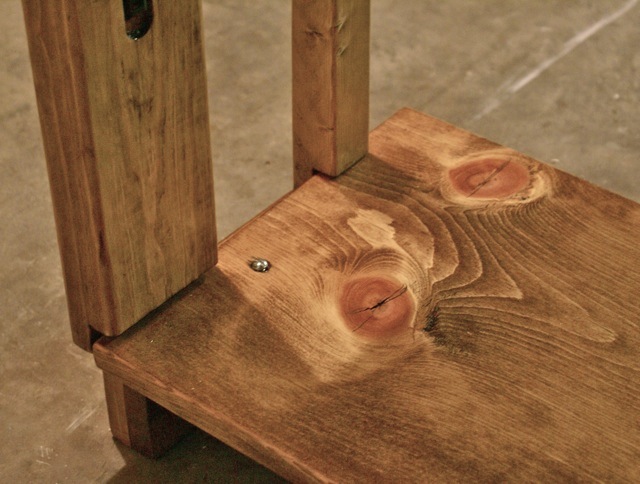
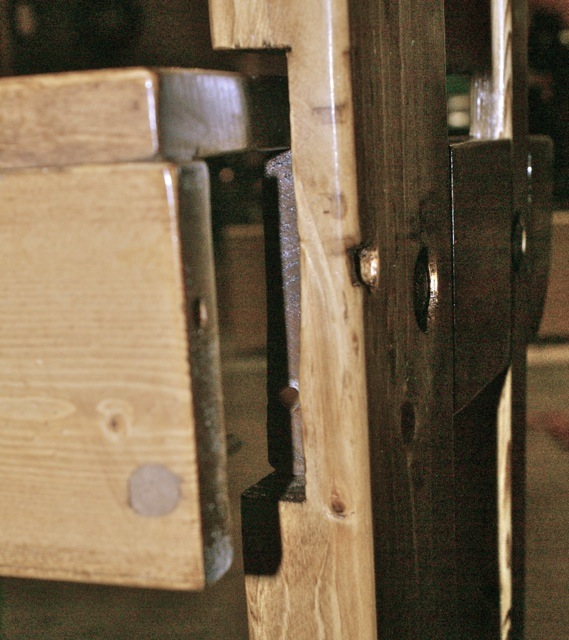
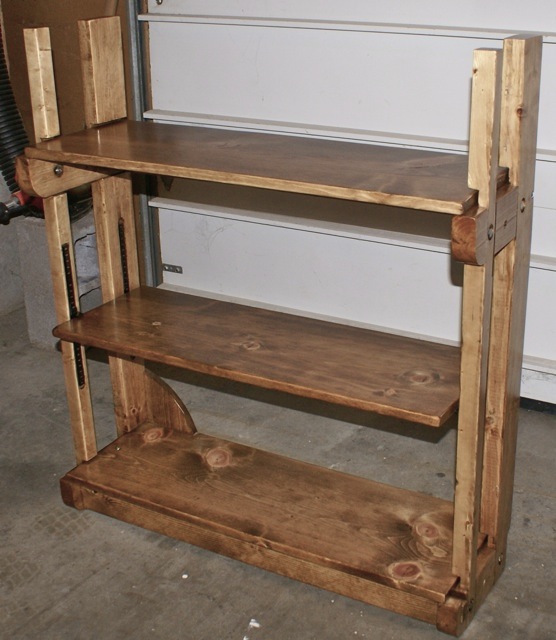
 Upper and Lower shelves and front kick panel or brace all locked into place.
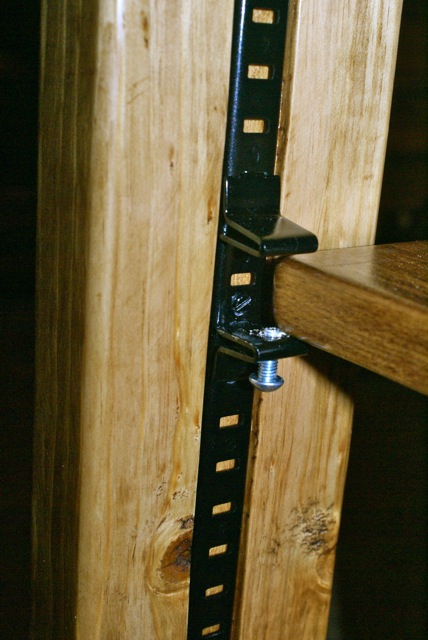
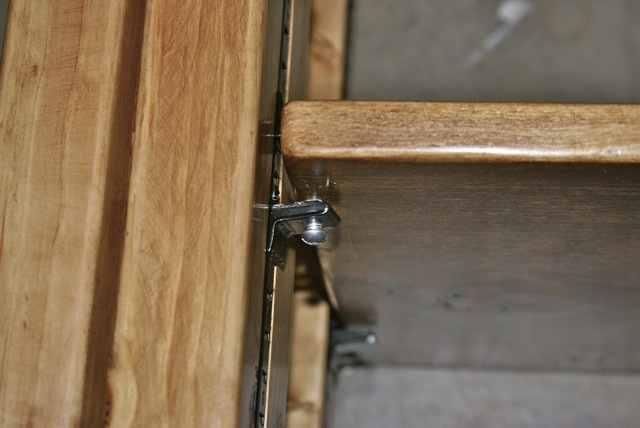
Insertion and Attachment of Middle Shelf
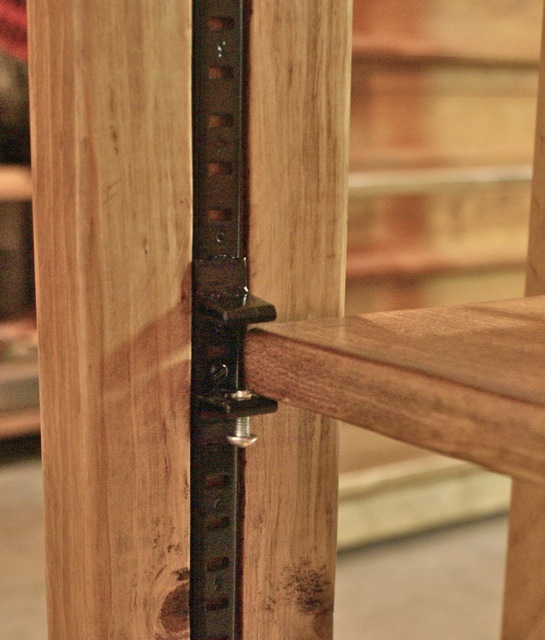
The adjustable middle shelf could simply sit on top of the clips, except remember we wanted this unit to be kid safe. So in order to keep the shelf from flipping up and off the unit, an upper clip is inserted, upside down, to keep the shelf in place. Unfortunately the shelf could still slide forward or backward. Put a one year old, barely able to walk, next to a sliding shelf and you know where the shelf and the kid will end up – on the floor!
So what was needed here was a way to lock the shelf in place. This was accomplished by drilling and tapping a locking screw in the back clips for the shelf. The screw can simply be hand tightened to insert it into a hole in the shelf – and no more sliding. Pictures follow.
 Hole in bottom back of shelf.
 Screw tapped into bottom clip and upper inverted clip inserted.


 Middle Shelf locked into place.
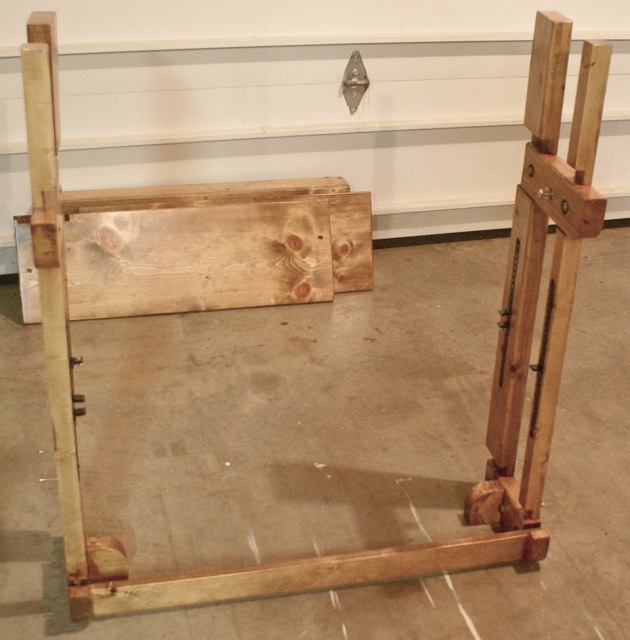
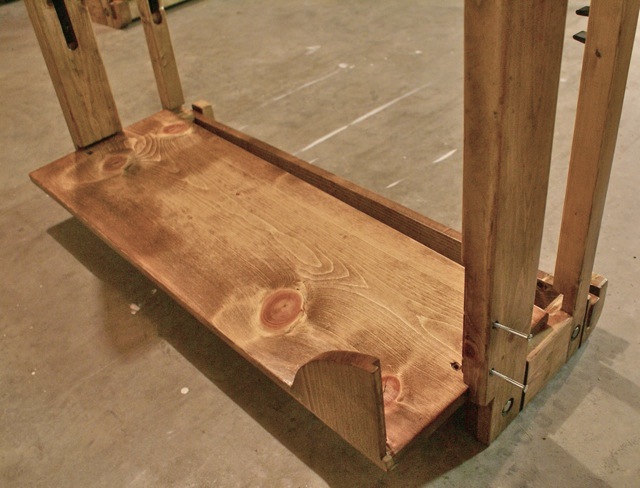
Final Pictures of One of the 3-ft Shelf Units

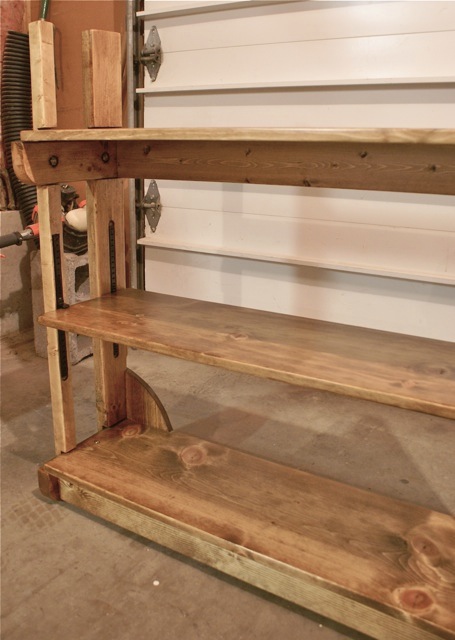
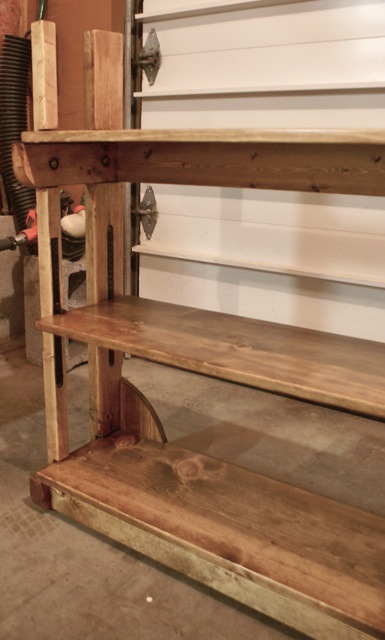

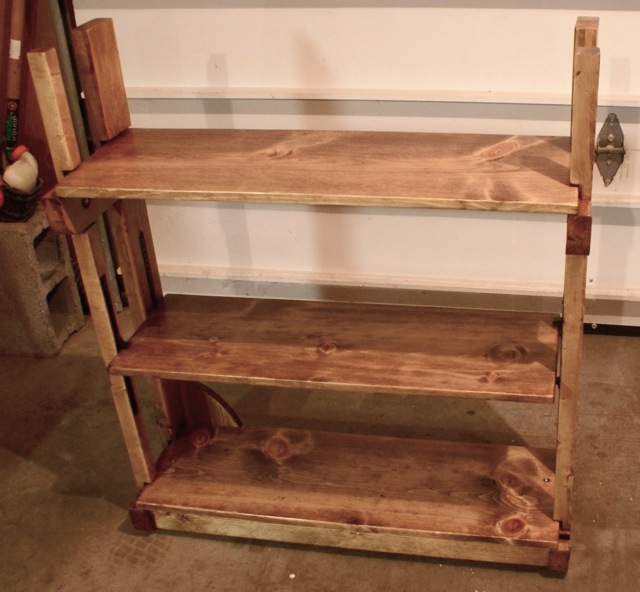
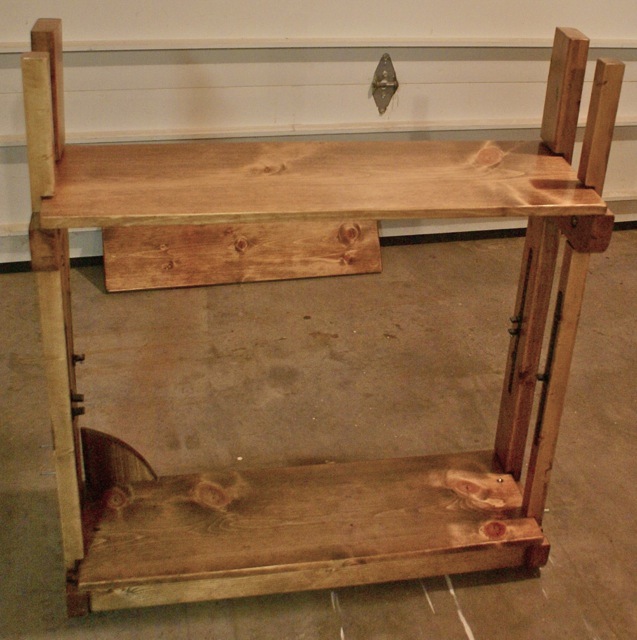
 Completed 3-ft Unit.
Now remember, we mentioned this unit can be used as a stand alone bookshelf, united to make a 6-ft long shelf, or placed top to bottom with another unit to make a 6 shelf tall standing unit. We chose to unite the two shelves as a 6-ft long piece, and that will be shown in the attached page…
Link to “Union of the Two 3-ft Shelving Units” Page
Link to A Portable Bookshelf 1 – Goals, Resources, Concept, Plans
