
The Prompt
About a month before Christmas, my daughter asked if I could make a bookshelf for her and our grandkids. We had a VERY old, unfinished, backless, bookshelf that I had made in my first year of grad school with a hammer, some nails and a (non-powered) hand saw, that gave her the idea. Well it’s been a long time since the hand saw days, and I figured I could be a little more creative than that by now, so I set out on a new journey.
The Goals
I figured with 4 kids in their small 3 bedroom house, Gina and Doug will be bound to be moving at least once more in their lives, so my initial goal was to make a bookshelf that would be portable – hopefully with no permanent screws. That portability would make it easily disassembled into parts that could be carried and trucked, and reassembled fairly easily too. My original size would have been 12 ft long, in two 6 foot pieces, but based on Gina’s current home size, we downsized that to a more reasonable
6 foot long shelf made of two 3 foot long sections.
I thought it would be cool if the two – 3 ft sections could be stacked as a tall bookshelf,
or united into a side by side unit, or even used as two separate 3 ft units – for use in different locations. The shelving units had to be kid safe and kid sturdy. And it would be nice if it had shelves of adjustable height.
So here’s a list of our Goals for the shelf.
1. Two – 3 ft long, by 12 in deep, 3-shelf units
2. Middle shelf with adjustable height
3. The 3 ft units could be United into a 6 ft long unit or Stacked into a 6-shelf tall unit
4. The Middle shelf would allow space for tall books, or an additional 4th-shelf could be added if needed later
5. The whole entire bookshelf would have NO permanent screws or nails (This goal was not quite met in the end, as 4 screws were eventually necessary for horizontal stability. The shelves wobbled a little from side to side without them).
6. Kid safe
7. Kid sturdy
8. And not look too too ugly!
The Resources
Now, for the True Carpenter in our readership, please note that I am by no means any kind of professional carpenter. I’ve built many different wood shelving units and cabinets, but all were simple enough to be eeeked out with a jig saw, a circular saw, a drill, sometimes a router and more recently a couple of electric sanders. This shelf was almost no different, EXCEPT this time I discovered that there was no way I could make the cuts I planned within physical reason without the use of a BAND SAW. And to meet that demand I was able to find a nice sturdy, all metal unit at Menards for $179 – my Christmas present from my wife, Mary Ann! Aren’t wives AWESOME!
So, keep in mind that THIS shelf was being built as a “first time use” of a band saw – I had a lot to learn – so ‘precision’ is not one of the words that could be used here. (I, the perfectionist would actually call my final product “pretty crude.” But if had to do it over, now I know where lots of improvements could be made.)
The shelving unit I prepared was also made from simple (cheap) white pine obtained from Lowes or Home Depot. I learned that some of that wood, that looks pretty nice in the stores, can get pretty WARPED a few weeks after you get it home. Then, once you have all those dimensions worked out and start putting the thing together, it doesn’t quite look or stand the way you originally planned. So for that reason, it was good that my precision was NOT EXACTLY as planned, because this way we had lots of unplanned, yet useful, wiggle room. Again, if I had to do it over again, I would be much more selective with the wood and maybe even go to a more expensive oak.
The Concept
The original concept of building a shelf unit that did not have any permanent screws or nails began with two end “Legs” that would hold shelves that would be slid into/onto them. The two legs would be joined by a locking, wooden cross bar or “brace” that would serve as a front kick panel (and would keep the kids toys from sliding under the bottom shelf as an added benefit).
The Legs would be built using a 2×4 vertical, back beam, a 2×2 vertical, front beam and two 2×4 horizontal, cross beams that would also serve for holding the top and bottom shelves. The back bottom of the vertical 2×4 would be notched for the wall baseboard, so that the shelf unit could be placed flush against a wall. The inside centers of the 2×4 and 2×2 vertical part of the Legs would be 3/4″ routed for the placement of adjustable clip strips for the middle shelf.

So, not knowing exactly how sturdy the shelf unit would actually be as per the original plan, I began building and then played it by ear to shore up what wasn’t working.
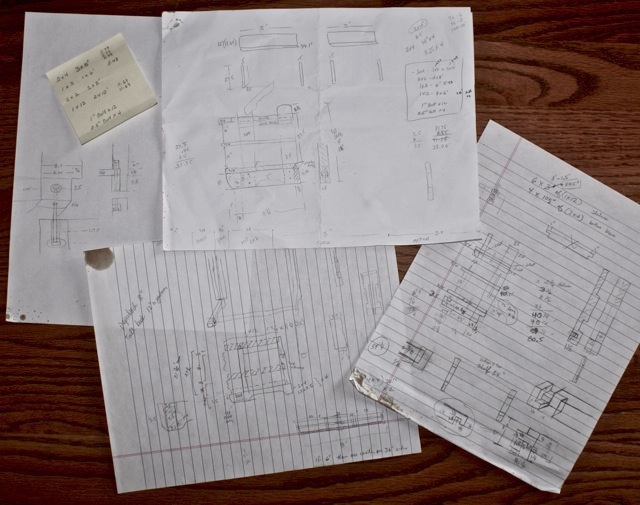
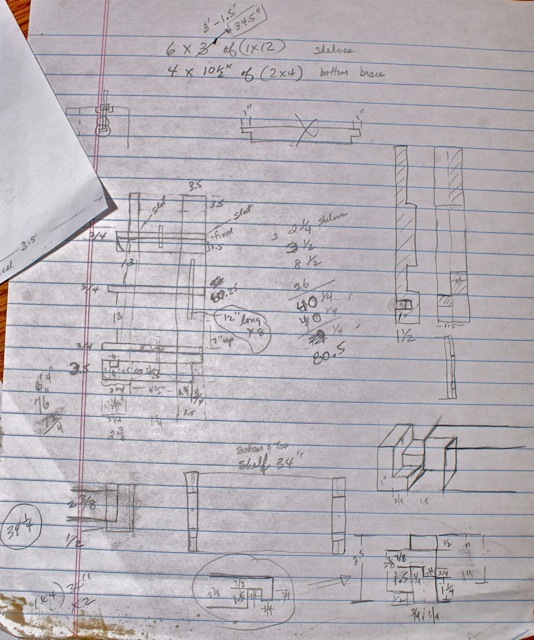
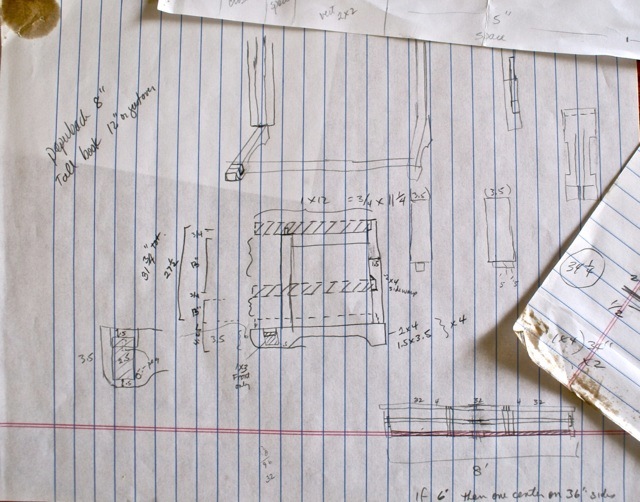
The Plans
Below are some of the original sketchings:

Link to “Construction of Legs” Photos Page
Link to A Portable Bookshelf 3 -Assembly of a 3-ft Shelving Unit
Link to A Portable Bookshelf 4 – Union of the Two 3-ft Shelves
